
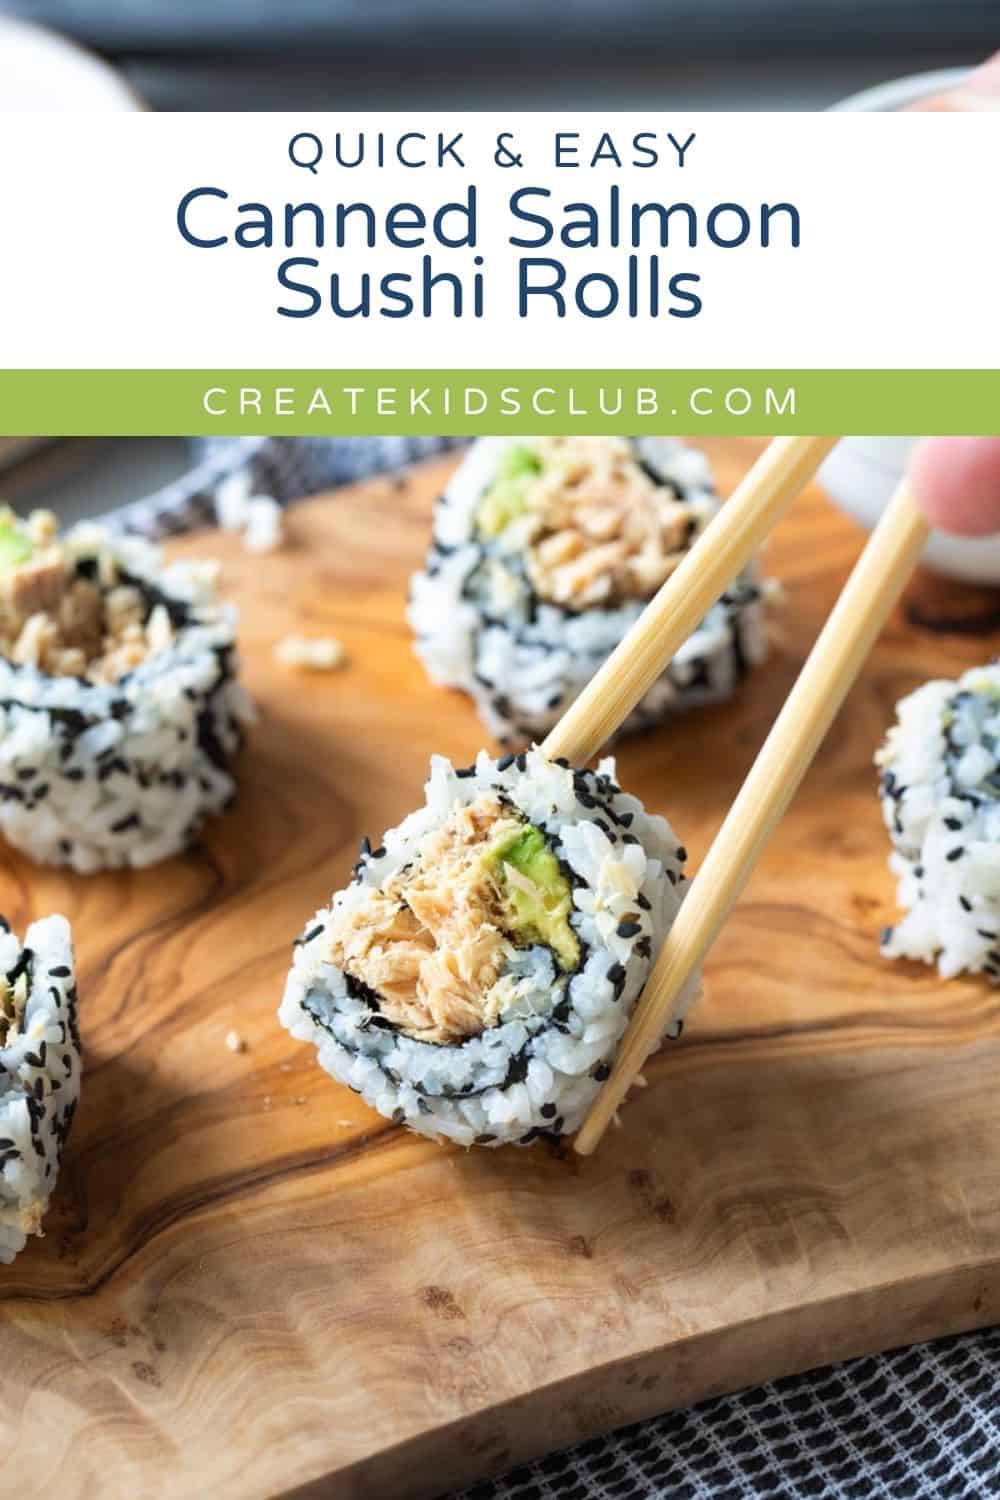
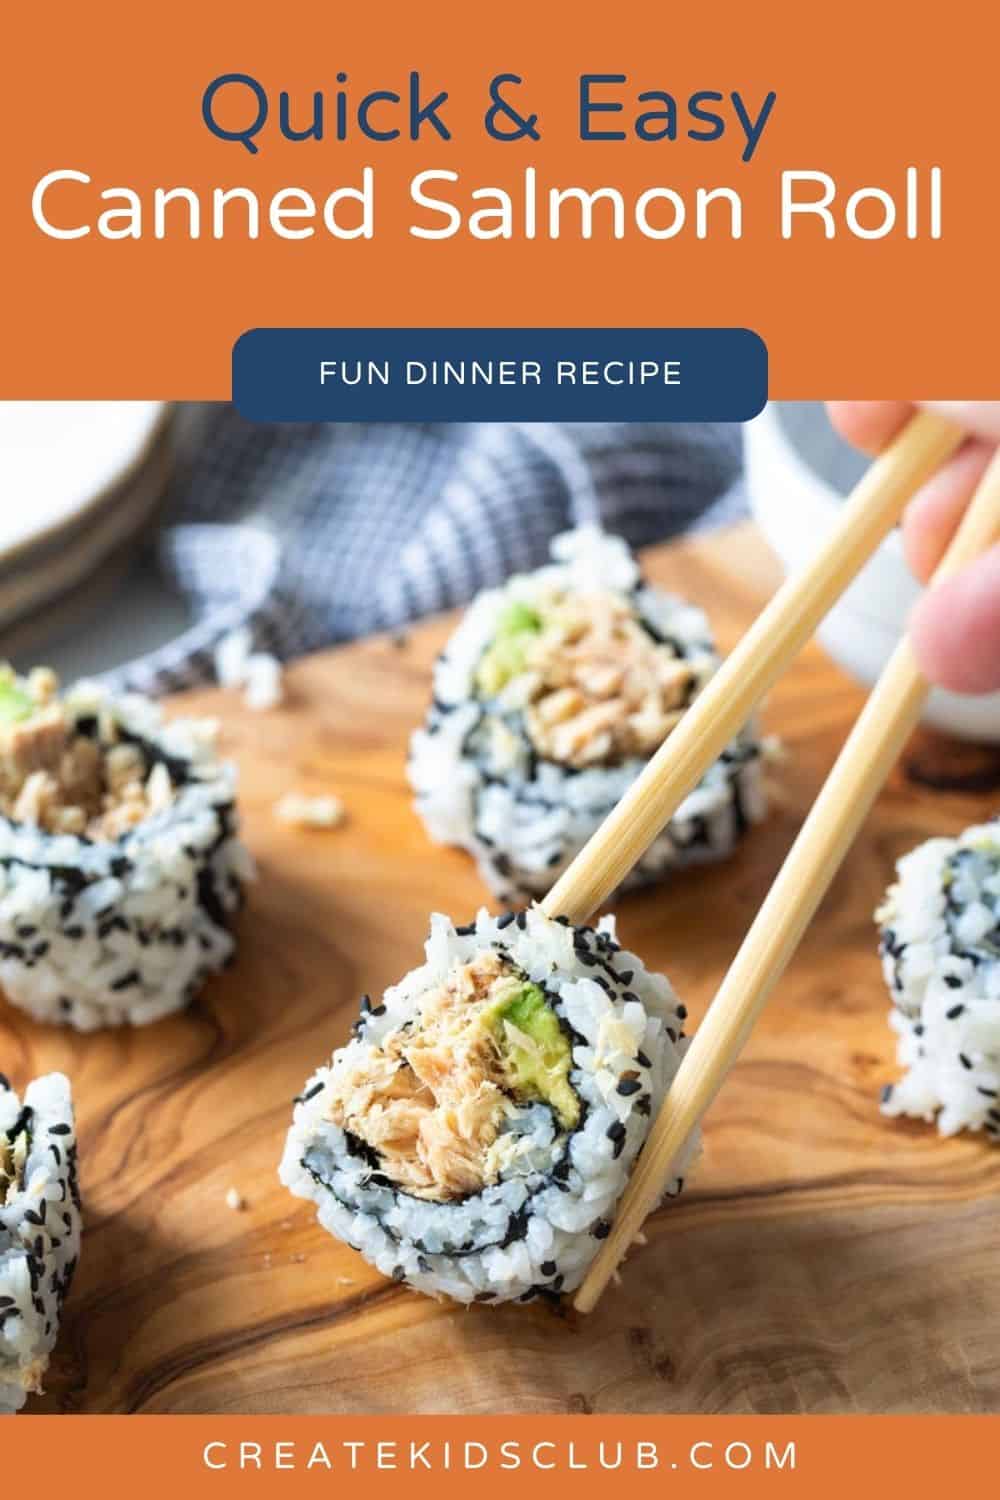
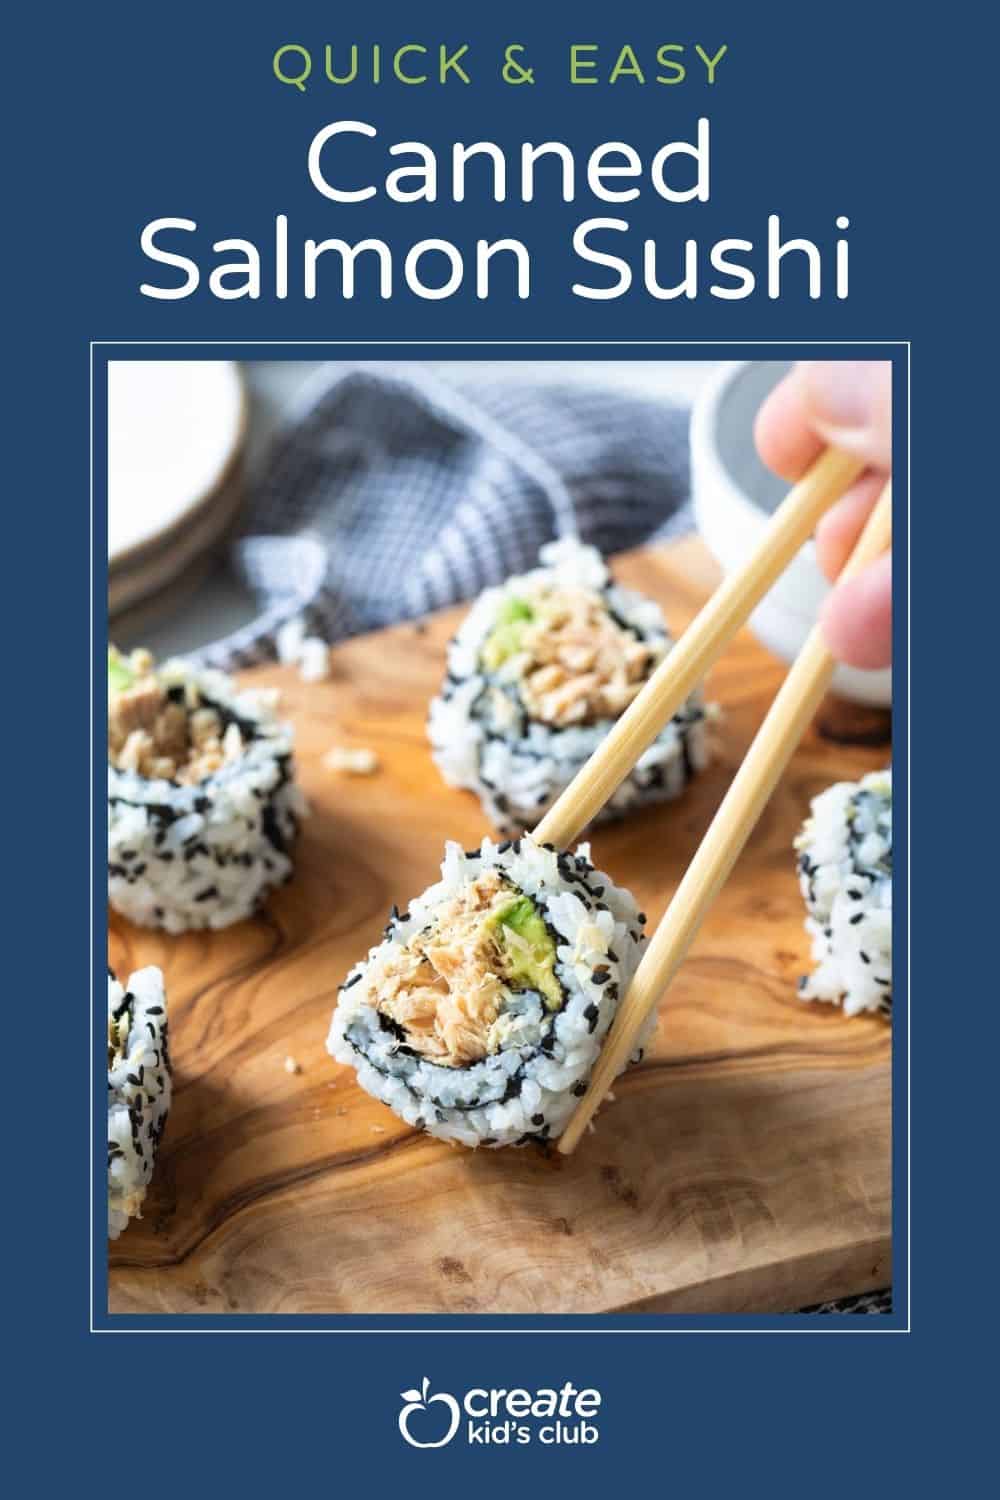
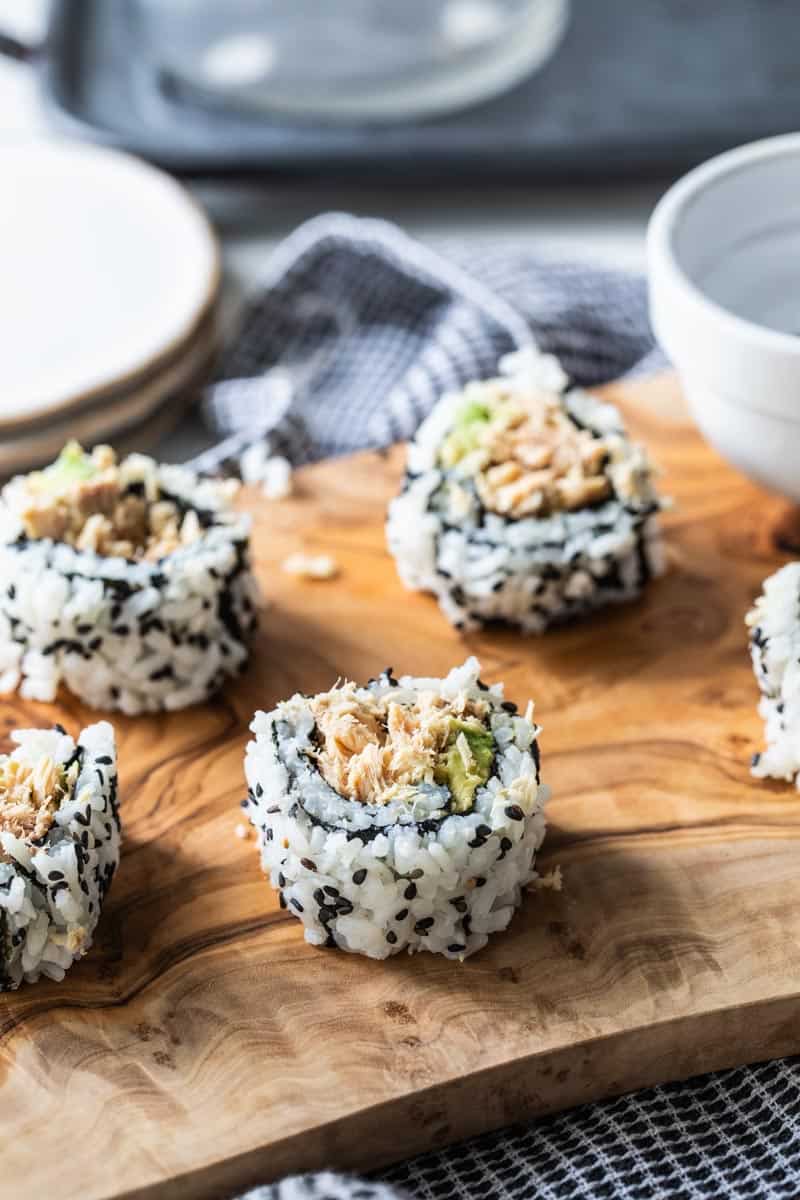
Our salmon sushi roll is not your ordinary sushi – they’re designed with kids in mind. We’re turning the rice inside out, making it the outer layer to create a unique and appetizing lunch or dinner. Our star ingredient? Canned salmon, packed with flavor and easy to use. Whether you’re a sushi-making novice or a seasoned pro, our step-by-step guide will help you make these delicious sushi rolls with ease.
Sushi with cooked salmon is not only a delicious recipe for kids to try, but it is a fantastic way to engage kids of all ages in the kitchen.
Each sushi roll is flavorful and packed with nutritious ingredients. Plus, rolling sushi is a hands-on activity that sparks creativity, encourages teamwork and introduces young children to Japanese cuisine.
Kids will learn everything from how to spread sushi rice to the importance of not overstuffing sushi rolls. This recipe is perfect for any day of the week!
Encourage your kids to cook in the kitchen with this salmon roll sushi or Grinch Punch, Frozen Strawberry Lemonade, Homemade Taquitos In Air Fryer or Tuna Sushi Rolls
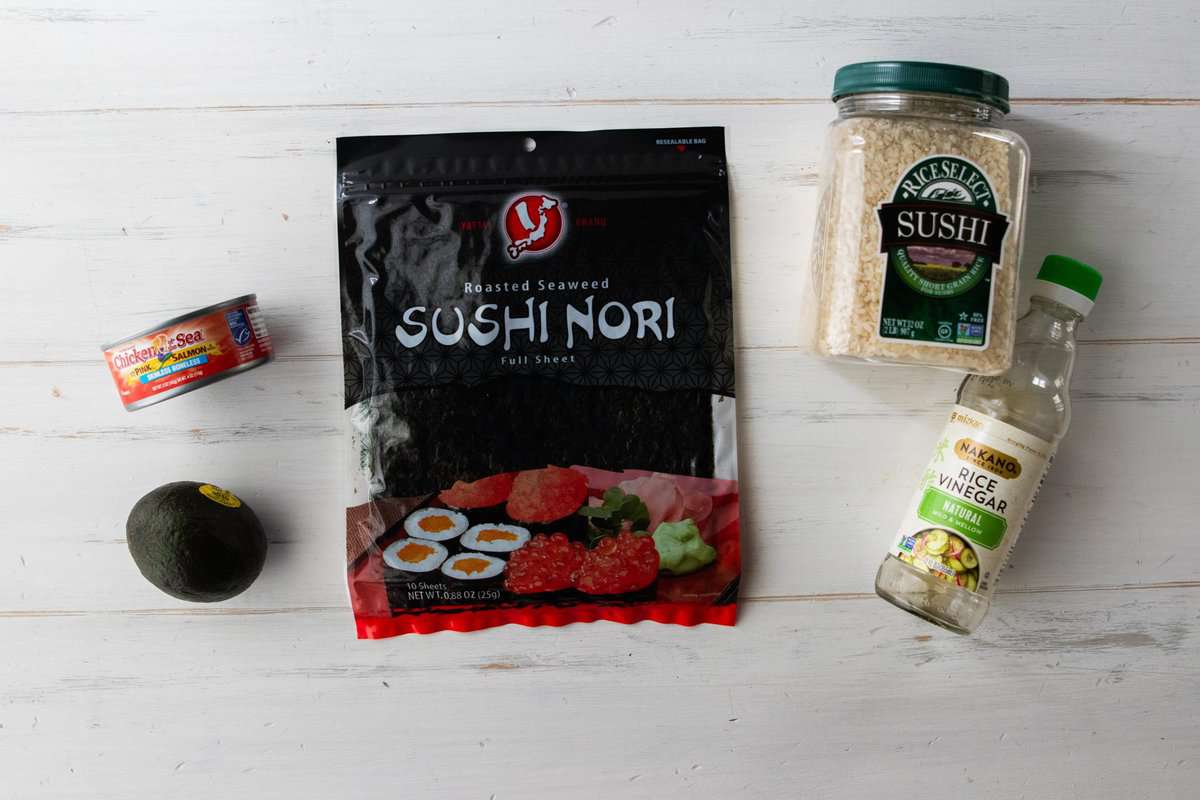
Table of Contents
Ingredients
- 1 cup cooked sushi rice
- 5 ounces canned salmon well drained
- 2 sheets nori
- 1 avocado sliced
- 3 tablespoons rice vinegar
- sesame seeds, optional
How To Make Salmon Sushi
Prepare the sushi rice per box instructions or follow step-by-step instructions to make Instant Pot Sushi Rice.
You do need to use sushi rice – this rice is sticky rice that holds the roll together. Once cooked add 3 tablespoons of rice vinegar then combine.
It must be rice vinegar, not white vinegar or apple cider vinegar whose flavors are too strong for rice. Seasoned rice vinegar is just rice vinegar with a little sugar and salt added for flavor.
Rice vinegar is also helps with the consistency of the rice and if using raw fish, helps balance the acidity. Let the rice cool.


Place the nori onto the sushi mat, shiny side facing up. Add about 1/3-1/2 cup of rice on top of the nori, gently pushing down. Sprinkle with sesame seeds if desired.
Place a piece of plastic wrap on top of the rice, pushing down gently then flip the roll over so that the nori is facing up. Add 1/2 can of salmon and strips of avocado.
Gently fold the end over the salmon and avocado pulling it tight gently and continue to roll. Refrigerate for 15 minutes for easier slicing.
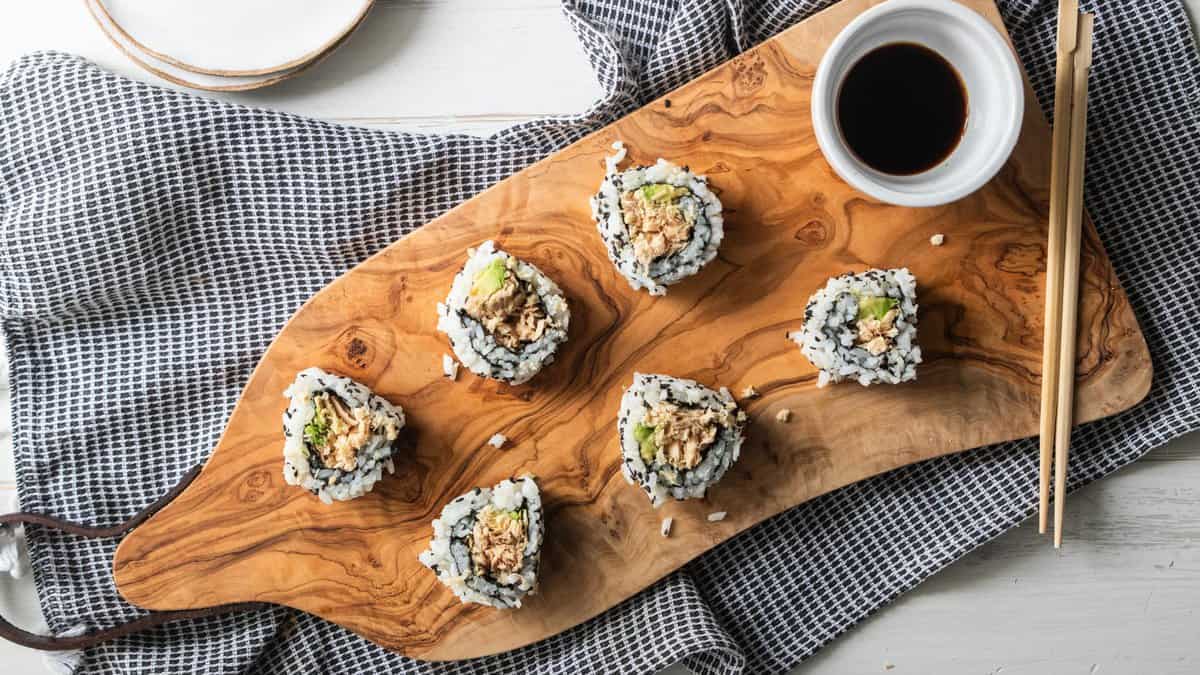
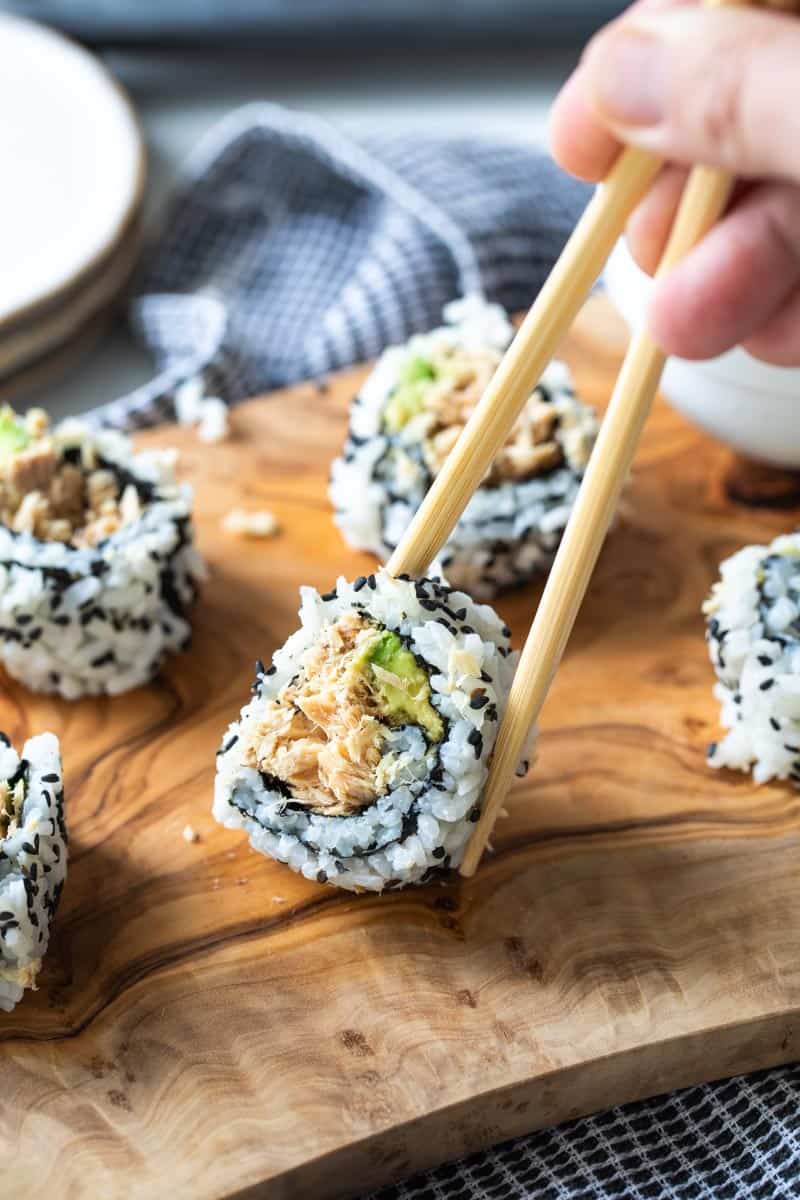
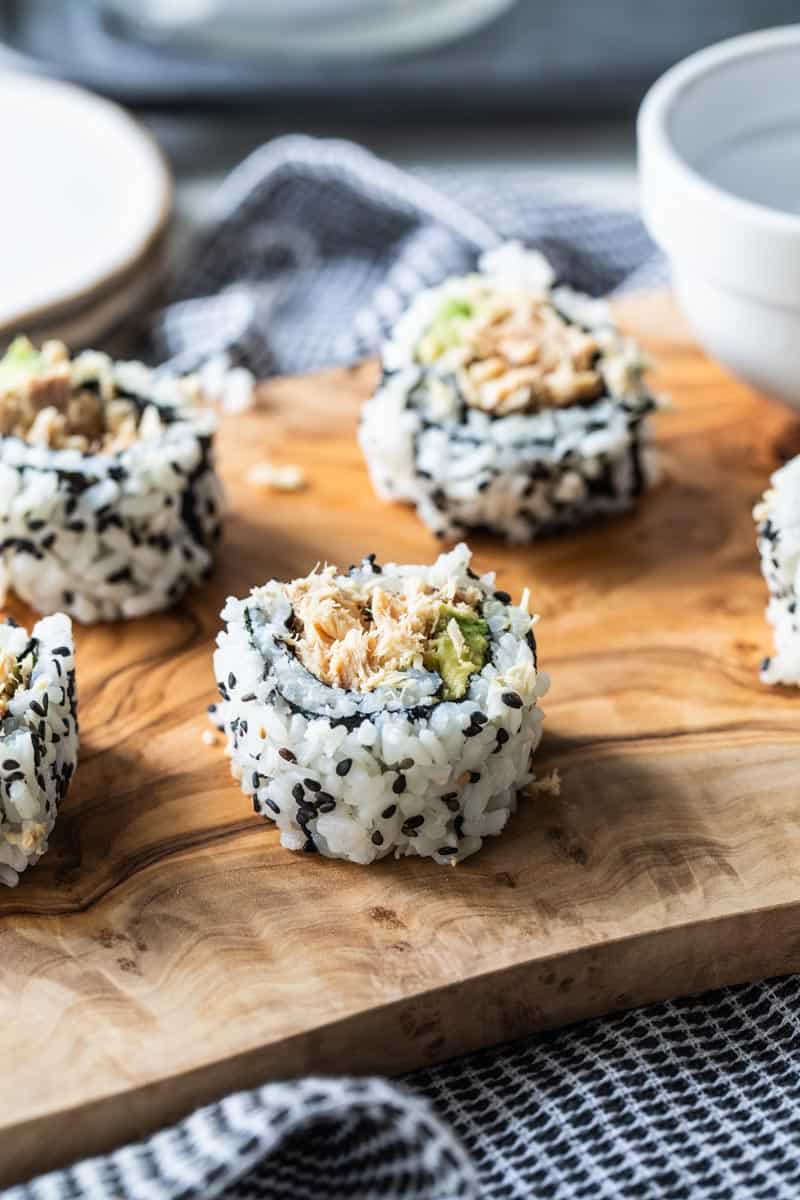
Slice sushi with a serrated knife starting by cutting in half, then halves again, and again for even-sized slices


Helpful Tips
- Substitute Ingredients: Canned salmon is used for this sushi recipe, which can easily be swapped with canned tuna. A fish-free sushi can also be made by swapping the salmon with thin cucumber slices. If using raw salmon, look for sushi-grade, as it’s prepared to be safe for raw consumption.
- Rice Preparation: When mixing the seasoned rice vinegar into the sushi rice, use a wooden or plastic spatula. This prevents the rice from being squashed, which could affect its texture.
- Rice Cooling: Allow the cooked rice to cool slightly before adding the seasoned rice vinegar. Hot rice can become too sticky and difficult to work with.
- Slicing Sushi: Use a very sharp knife when slicing the rolls for a mess-free experience. If making with kids, have them hold the top of your hand when slicing to prevent accidents while allowing them to understand how to cut sushi into rolls.
- Slicing Technique: Hold the knife with gentle pressure and use a sawing motion to slice the roll. This will help you achieve clean slices without compressing the roll.
- Dipping Water: When you wet your fingers to seal the roll, use a small bowl of water to keep your fingers moist. This will prevent the rice from sticking to your hands and help in creating a tight seal.
- Omit Sesame Seeds: While the sesame seeds offer a pop of color and texture to the rolls, omit to meet dietary needs or food preferences as needed.
- Use a Sushi Mat: Rolling sushi in a sushi mat will make the experience wildly easier. If you do not own a mat, keep reading for instructions on how to roll.
- Make Enough Sushi: You can plan on one roll (roughly 6 pieces when sliced) per person. For smaller children, half a roll will likely be enough.
Frequently Asked Questions
You can, but it will be trickier. Start by lifting the edge of the plastic wrap closest to you, with the Nori sheet and rice, and start rolling it over the fillings, using your fingers to tuck the fillings in and tighten the roll as you go. Be gentle but firm. When you’ve rolled it up halfway, remove the plastic wrap. Continue rolling the sushi until you reach the exposed edge of the Nori sheet. Wet the edge of the Nori sheet with a little water to help it stick, and then press it to seal the roll. Refrigerate then slice and serve.
The amount depends on the size of the roll you prefer. As a general guideline, add about 1/3-1/2 cup per roll. If you like thicker rice layers, then use more. If you prefer a lighter layer, use less.
Sushi rice is very sticky and can cling to the mat’s surface without the plastic wrap as a barrier. It also makes for an easy cleanup and consistency in the shape of your sushi rolls.
Be carefully not to overfill the roll. Adding a thin layer of each ingredient will help the roll to stick together. Overstuffing will cause ingredients to spill out of the roll when sliced.
What to Serve with Sushi
For classic sides, consider serving sushi with soy sauce, wasabi, and pickled ginger.
To get creative, try drizzling the sushi with additional vinegar or dipping the rolls in spicy mayo. Edamame that has been steamed and salted along with tempura vegetables are also tasty sides that everyone will enjoy.
Storing Instructions
Sushi is best enjoyed on the same day it’s made, as the quality of the ingredients can deteriorate over time. However, the sushi rice can be made in advance and stored in the fridge until ready to roll.
If you need to store the rolls for a short period, they can last in the refrigerator for up to 24 hours. To maintain the desired texture and taste, refrain from slicing the rolls until just before serving.
When you’re ready to enjoy the stored sushi rolls, carefully unwrap them and slice them into pieces. Remember that sushi tastes its best when it’s fresh, so try to consume the stored rolls as soon as possible to appreciate the flavors and textures to the fullest.
We recommend not freezing salmon sushi or any other variety of sushi rolls. For recipes that freeze extremely well, check out Baked Beans, Eggs in the Oven and Sheet Pan Pancakes From Mix.
Kids In The Kitchen
Cooking tips and suggestions for kids making this recipe.
- Sushi rolls can be filled with many different fillings such as cream cheese, tuna, salmon, chicken, avocado, cucumber, and carrots. What combination do you think you would like best?
- Sushi is typically served with pickled ginger, wasabi and soy sauce. Wasabi is spicy so if you want to try, taste test a very small piece.
- Rolling sushi takes a lot of patience as you need to carefully roll. Try singing a song while you roll slowly to have fun in the kitchen.
More Easy Salmon Recipes
- Oven Baked Salmon in Foil
- Sheet Pan Salmon
- How to Cook Frozen Salmon in Air Fryer
- Salmon Buddha Bowl
- Gluten Free Salmon Cakes
- Honey Glazed Ginger Garlic Salmon
- Air Fryer Salmon Patties
- Canned Salmon Pasta Recipe
CKC Features both Gluten-Free Guidance and Kids Cooking Instructions: If you’re new to eating gluten-free we understand it’s overwhelming trying to figure out which foods may contain gluten and which ones don’t. All of our gluten-free recipes marked with this symbol ✅ represent foods that need to be checked for gluten or cross-contamination.
The ⭐️ symbol in the recipe below denotes the steps in which kid cooks may need a helper (depending on age). If there is no ⭐️ symbol, that step (or recipe) doesn’t require a helper.
Salmon Sushi Roll Recipe
Equipment
- sushi mat
- serrated knife
Ingredients
- 1 cup cooked sushi rice
- 5 ounces canned salmon well drained✅
- 2 sheets nori ✅
- 1 avocado sliced
- 3 tablespoons rice vinegar ✅
- sesame seeds optional✅
Instructions
- ⭐️Prep the rice. Prepare the sushi rice per box instructions. Once cooked add 3 tablespoons of rice vinegar then combine. Let cool.1 cup cooked sushi rice, 3 tablespoons rice vinegar
- Prep the sushi. Place the nori onto the sushi mat, shiny side facing up. Add about 1/3-1/2 cup of rice on top of the nori, gently pushing down. Sprinkle with sesame seeds if desired. Place a piece of plastic wrap on top of the rice, pushing down gently then flip the roll over so that the nori is facing up. Add 1/2 can of salmon and strips of avocado.5 ounces canned salmon, 2 sheets nori, 1 avocado, sesame seeds
- Roll the sushi. Gently fold the end over the salmon and avocado pulling it tight gently and continue to roll. Refrigerate for 15 minutes for easier slicing.
- ⭐️Slice and serve. Slice sushi with a serrated knife starting by cutting in half, then halves again, and again for even-sized slices.
Notes
- Substitute Ingredients: Canned salmon is used for this sushi recipe, which can easily be swapped with canned tuna. A fish-free sushi can also be made by swapping the salmon with thin cucumber slices. If using raw salmon, look for sushi-grade, as it’s prepared to be safe for raw consumption.
- Rice Preparation: When mixing the seasoned rice vinegar into the sushi rice, use a wooden or plastic spatula. This prevents the rice from being squashed, which could affect its texture.
- Rice Cooling: Allow the cooked rice to cool slightly before adding the seasoned rice vinegar. Hot rice can become too sticky and difficult to work with.
- Slicing Sushi: Use a very sharp knife when slicing the rolls for a mess-free experience. If making with kids, have them hold the top of your hand when slicing to prevent accidents while allowing them to understand how to cut sushi into rolls.
- Slicing Technique: Hold the knife with gentle pressure and use a sawing motion to slice the roll. This will help you achieve clean slices without compressing the roll.
- Dipping Water: When you wet your fingers to seal the roll, use a small bowl of water to keep your fingers moist. This will prevent the rice from sticking to your hands and help in creating a tight seal.
- Omit Sesame Seeds: While the sesame seeds offer a pop of color and texture to the rolls, omit to meet dietary needs or food preferences as needed.
- Use a Sushi Mat: Rolling sushi in a sushi mat will make the experience wildly easier. If you do not own a mat, keep reading for instructions on how to roll.
- Make Enough Sushi: You can plan on one roll (roughly 6 pieces when sliced) per person. For smaller children, half a roll will likely be enough.
Nutrition
If you enjoyed these recipes make sure to leave a comment and a star rating below!
Then follow us on social media and tag #createkidsclub if you make the recipe. We love seeing what you come up with!


Leave a Reply