
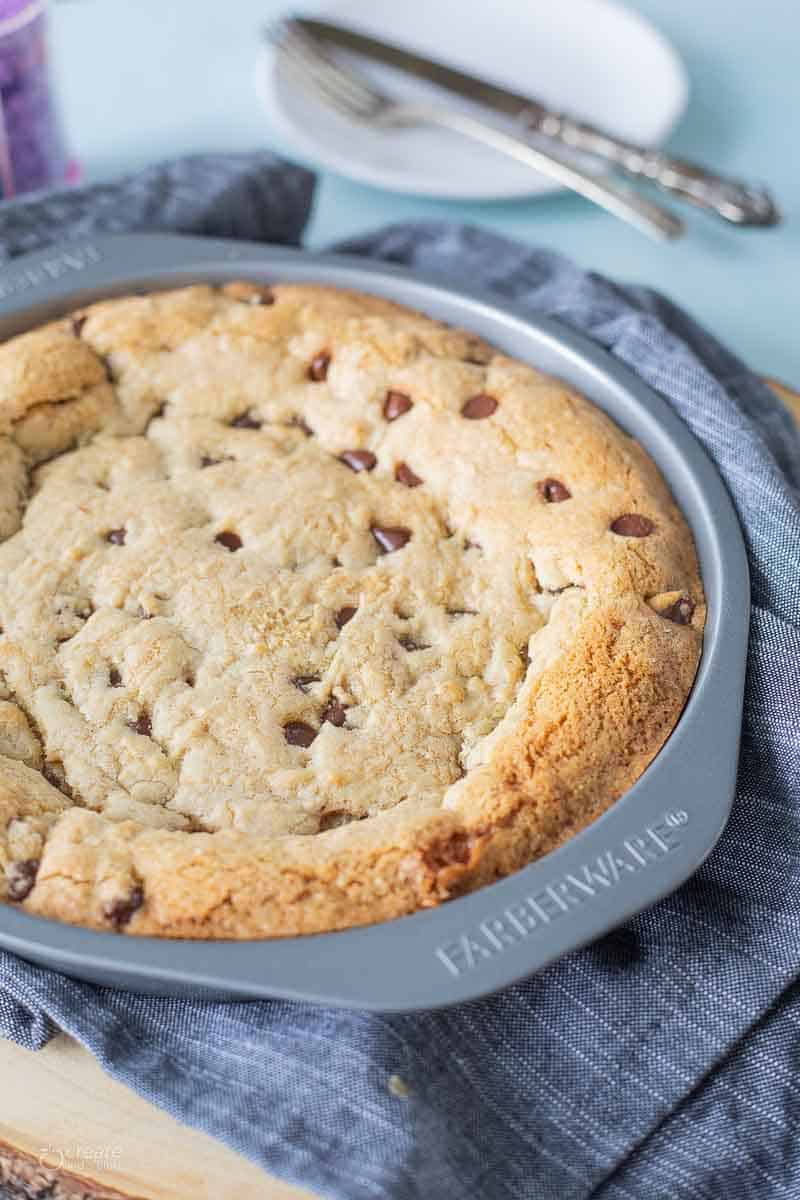
Our gluten-free chocolate chip cookie cake recipe will become your go-to cookie recipe! Made with shortening and coconut oil rather than butter, this dairy-free cookie cake is moist on the inside and crisp on the outside. Decorate as you wish for celebrations, birthdays, or as an after-school treat.
This cake recipe was created with the flavor of traditional chocolate chip cookies without the hassle of making individual cookies. Plus, kids love being served a giant chocolate chip cookie to celebrate any occasion or achievement! This gluten free cookie cake rivals any regular version – guests will never know the difference!
Encourage young bakers in your home to help along the way or tackle this recipe all on their own. It is amazing to see their creativity shine as they bake and decorate their cake.
We will take you step by step to create this cake in no time at all while sharing our absolute favorite dairy-free frosting recipe. Transform the frosting into any color that you wish to pipe or spread on top of your chocolate chip cake.
On the search for more gluten-free dessert recipes perfect for any occasion? We have you covered with our Dirt Pudding Cups, Mini Flourless Chocolate Cake, and Gluten-Free Apple Cider Donuts. All recipes kid approved!

Table of Contents
Ingredients
- 2 1/4 cup gluten-free flour blend
- 1 teaspoon baking soda ✅
- 1/2 teaspoon salt
- 1/2 cup shortening
- 1/4 cup coconut oil
- 3/4 cup brown sugar
- 1/4 cup granulated sugar
- 2 large eggs
- 1 teaspoon vanilla ✅
- 1 cup dairy-free chocolate chips ✅
*Tested successfully with Bob’s Red Mill 1 to 1 Baking Flour. We cannot guarantee similar results with different brands of gluten-free flour as all blends are not created equal.
How To Make GF Cookie Cake
Preheat the oven to 325°F.
Whisk the dry ingredients
In a medium-sized mixing bowl, whisk together the flour, baking soda, and salt. Set aside.
Cream the shortening and sugar
In the bowl of the stand mixer, add the shortening, coconut oil, brown sugar, and granulated sugar. Mix until well blended. Add 1 egg and the vanilla blending until the egg is mixed in. Add the second egg and blend.


Add the dry ingredients to the wet
Add the flour mixture to the wet mixture in the mixing bowl. Blend until combined, stopping the blender to scrape the sides with a spatula as needed. Add the chocolate chips and blend until just combined. Scoop the dough into the pie pan and spread with the spatula.


Refrigerate the dough
Place the pie pan into the freezer for 15 minutes or the refrigerator for 30 minutes.


Bake
Bake 25-27 minutes or until the middle is set and golden brown. Let cool for 10-15 minutes before slices.
Serve
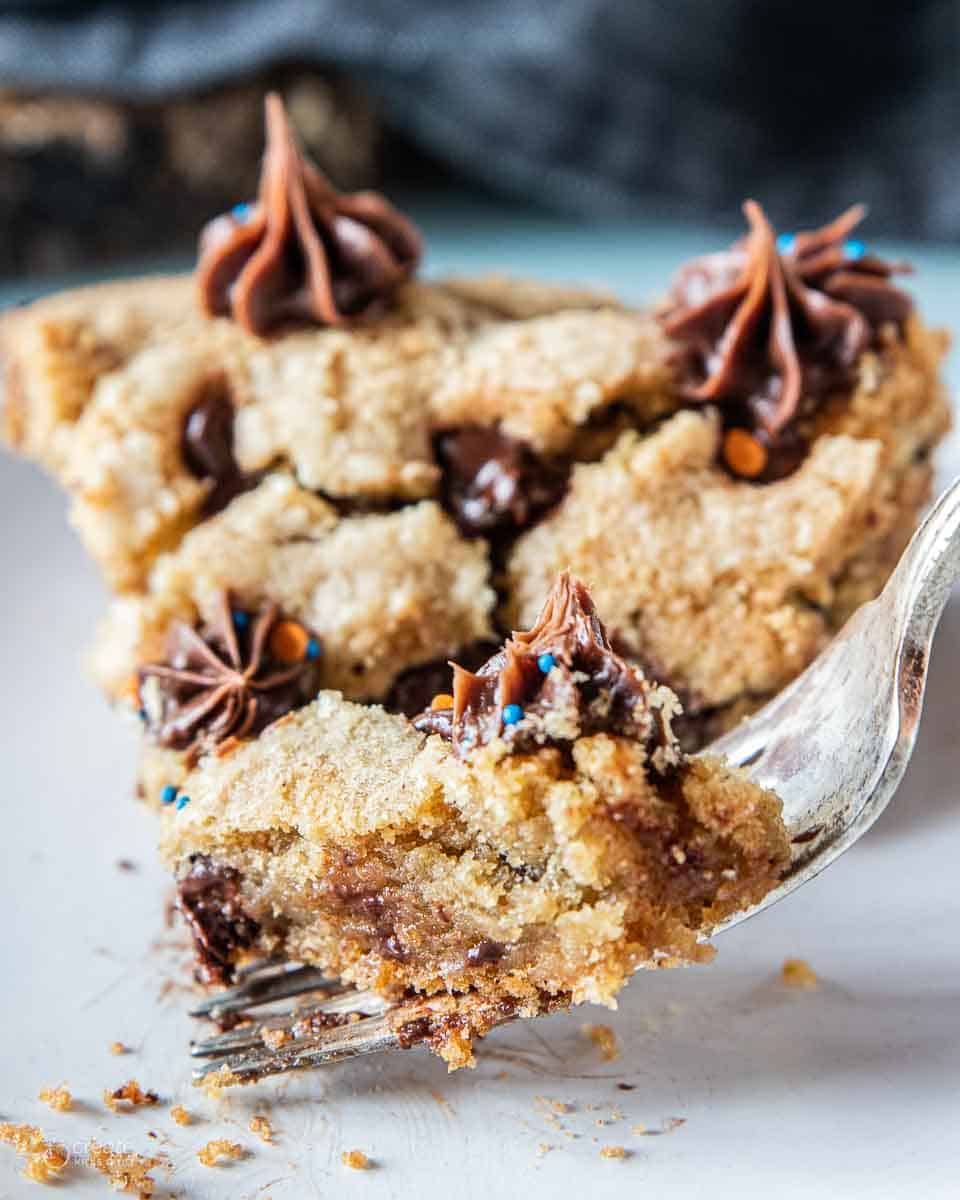
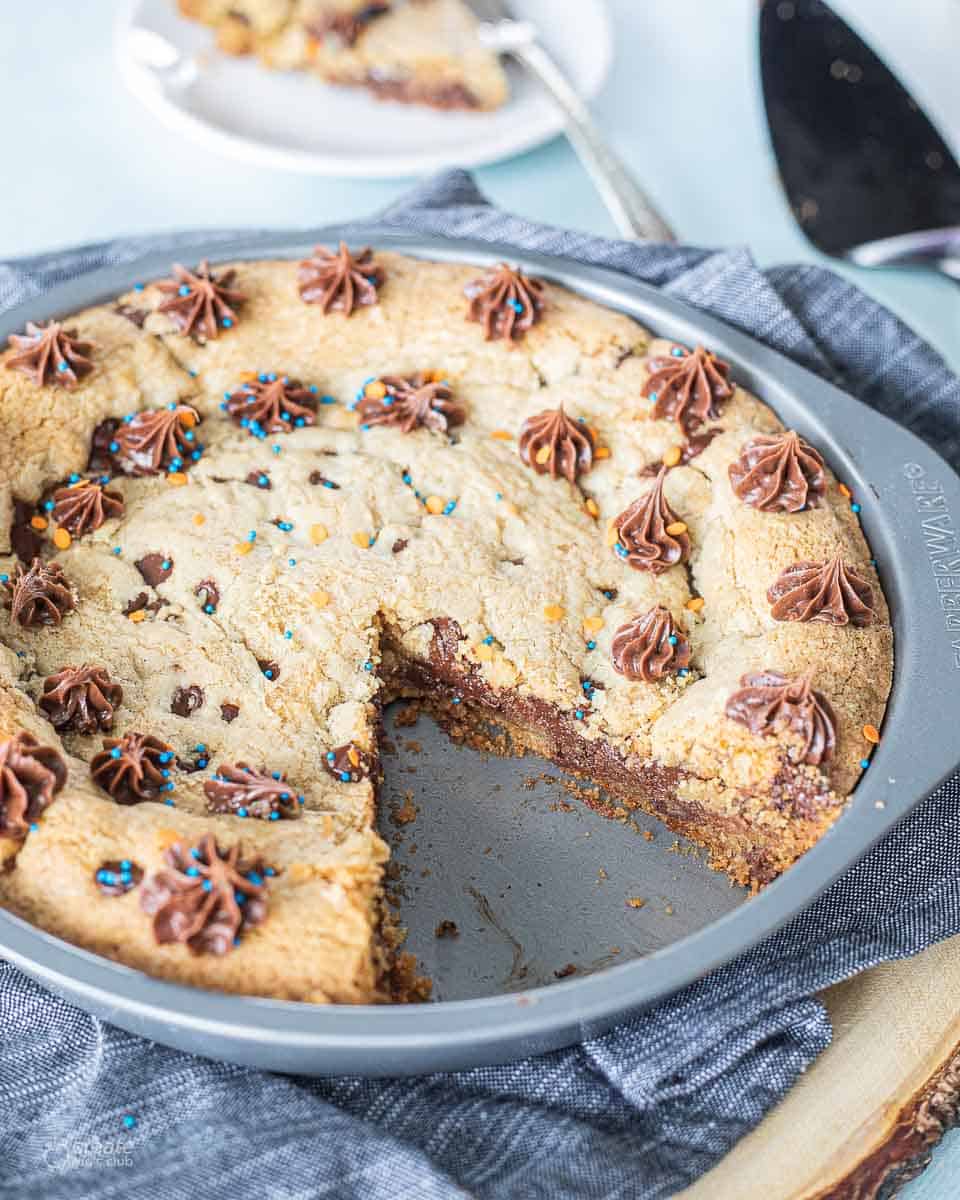
Serve as is or use your favorite gluten-free, dairy-free frosting and sprinkles to decorate.


Dairy Free Frosting
Our go-to frosting recipe for all cake decorating is our Dairy Free Frosting. This creamy frosting easily pipes onto any cake and is a kid favorite.
Simply insert any decorating tip into a piping bag then fill with the frosting to add a design or words onto the cake once cooled. Dust the top of the cake with sprinkles for a final touch before serving.
Recipe Tips and Tricks
- Quality Ingredients: Ensure you’re using high-quality ingredients, especially the gluten-free flour blend and dairy-free chocolate chips. Using good-quality ingredients can significantly impact the taste and texture of your cookies.
- Room Temperature Ingredients: Allow ingredients like eggs to come to room temperature before using them. Room-temperature ingredients blend more easily and evenly, resulting in a smoother cookie dough.
- Measuring Flour: When measuring the gluten-free flour blend, spoon it into the measuring cup and level it off with a straight edge. Avoid scooping directly from the bag, as it can compact the flour, leading to inaccurate measurements.
- Mixing Techniques: Use the stand mixer on low speed when incorporating dry ingredients into the wet mixture. This prevents overmixing, which can result in tough cookies. Scrape down the sides of the bowl periodically to ensure even mixing.
- Cookie Dough Texture: The cookie dough should be soft but firm enough to hold its shape when scooped onto the baking sheet. If it’s too sticky, you can refrigerate it for a little longer to firm up before baking.
Frequently Asked Questions
This recipe has been tested with Bob’s Red Mill 1 to 1 Baking Flour multiple times with great results. If using another gf flour blend, ensure it contains xanthan gum. If not, add as an ingredient according to package directions.
Yes, you can freeze the cookie dough for later use. Scoop the dough onto a baking sheet, freeze until firm, then transfer to a freezer bag or container. When ready to bake, place the frozen dough on a baking sheet and bake as directed, adding a few extra minutes to the baking time
Yes, you can make the dough ahead of time and refrigerate it for up to 24 hours before baking. Just let it come to room temperature for about 10-15 minutes before scooping and baking.
Storage Instructions
Store covered in the fridge for up to 5 days. Thaw at room temperature before serving. If you’d like to freeze the cake, bake, cool, and place unfrosted in the freezer for up to 3 months. When ready to serve, thaw at room temperate then frost and slice.
Kids In The Kitchen
Cooking tips and suggestions for kids making this recipe.
- “Cream” means to blend ingredients together until well blended and have a creamy texture. Butter (or shortening) and sugar are common ingredients you will “cream”.
- For safety, always stop the mixer when scraping the sides of the bowl – never try to scrape while the mixer is running.
- Before adding the flour, read the ingredient label searching for “xanthan gum”. If not found, ask your helper for assistance to add according to package instructions.
- Make mini cookie cakes by using cookie cutters to press shapes into the cake.
More Gluten-Free Cookie Recipes
While we do love serving this giant cookie cake any chance we get, we cannot forget about all our favorite individual cookie recipes!
- Gluten Free Peanut Butter Blossoms
- Gluten Free Peanut Butter Balls
- The Best Vegan and Gluten-free Chocolate Chip Cookies
- Gluten Free Chocolate Peanut Butter Cookies
- Gluten Free Gingerbread Cookies
- 35 Gluten Free Christmas Cookie Recipes
CKC Features both Gluten-Free Guidance and Kids Cooking Instructions: If you’re new to eating gluten-free we understand it’s overwhelming trying to figure out which foods may contain gluten and which ones don’t. All of our gluten-free recipes marked with this symbol ✅ represent foods that need to be checked for gluten or cross-contamination.
The ⭐️ symbol in the recipe below denotes the steps in which kid cooks may need a helper (depending on age). If there is no ⭐️ symbol, that step (or recipe) doesn’t require a helper.
Gluten Free Chocolate Chip Cookie Cake
Equipment
- 9.5-inch pie pan
- stand mixer with the whisk attachment or handheld mixer and bowl
Ingredients
- 2 1/4 cup gluten-free flour blend tested with Bob's Red Mill 1 to 1 Baking Flour
- 1 teaspoon baking soda ✅
- 1/2 teaspoon salt
- 1/2 cup shortening
- 1/4 cup coconut oil
- 3/4 cup brown sugar
- 1/4 cup granulated sugar
- 2 large eggs
- 1 teaspoon vanilla ✅
- 1 cup dairy-free chocolate chips ✅
Instructions
- Preheat the oven. Preheat the oven to 325°F.
- Whisk the dry ingredients. In a medium-sized mixing bowl, whisk together the flour, baking soda, and salt. Set aside.2 1/4 cup gluten-free flour blend, 1 teaspoon baking soda, 1/2 teaspoon salt
- ⭐️ Cream the shortening and sugar. In the bowl of the stand mixer, add the shortening, coconut oil, brown sugar, and granulated sugar. Mix until well blended. Add 1 egg and the vanilla blending until the egg is mixed in. Add the second egg and blend.1/2 cup shortening, 1/4 cup coconut oil, 3/4 cup brown sugar, 1/4 cup granulated sugar, 2 large eggs, 1 teaspoon vanilla
- ⭐️ Add the dry ingredients to the wet. Add the flour mixture to the wet mixture in the mixing bowl. Blend until combined, stopping the blender to scrape the sides with a spatula as needed. Add the chocolate chips and blend until just combined. Scoop the dough into the pie pan and spread with the spatula.1 cup dairy-free chocolate chips
- Refrigerate the dough. Place the pie pan into the freezer for 15 minutes or the refrigerator for 30 minutes.
- ⭐️ Bake. Bake 25-27 minutes or until the middle is set and golden brown. Let cool for 10-15 minutes before slices.
- Serve. Serve as is or use your favorite gluten-free, dairy-free frosting and sprinkles to decorate.
Notes
- This recipe has been tested with Bob’s Red Mill 1 to 1 Baking Flour multiple times with great results. If using another gf flour blend, ensure it contains xanthan gum. If not, add as an ingredient according to package directions.
- Store covered in the fridge for up to 5 days. Thaw at room temperature before serving. This cake can also be prepped, baked, cooled and place unfrosted in the freezer. When ready to serve, thaw at room temperate then frost and slice.
- Our go-to for all cake decorating is our Dairy Free Frosting. This creamy frosting easily pipes onto any cake and is a kid favorite. Simply insert any decorating tip into a piping bag then fill with the frosting to add a design or words onto the cake once cooled. Dust the top of the cake with sprinkles for a final touch before serving.
Nutrition
If you enjoyed these recipes make sure to leave a comment and a star rating below!
Then follow us on social media and tag #createkidsclub if you make the recipe. We love seeing what you come up with!


Leave a Reply