Pumpkin Chocolate Chip Bread
This post may contain affiliate links. See our discloure policy.

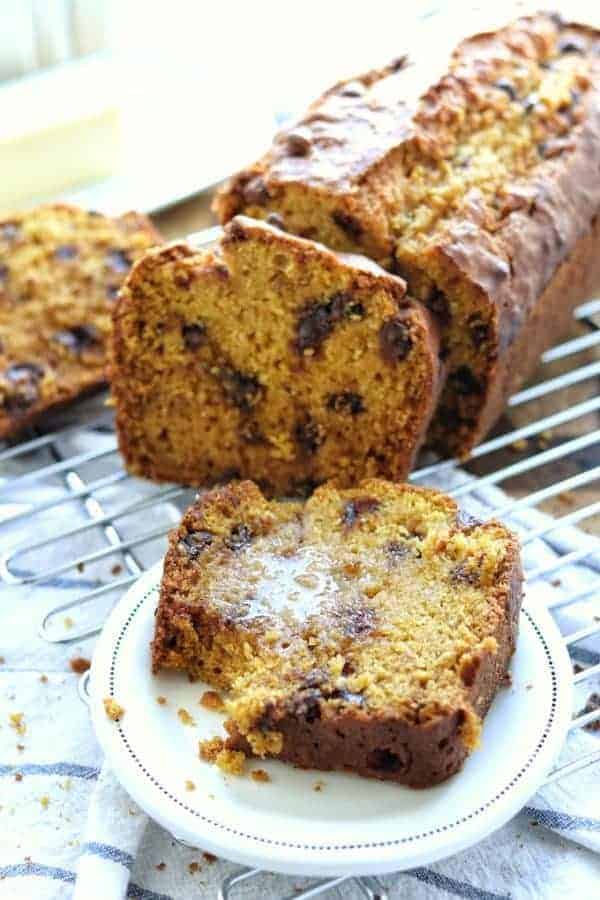
Uncover the magic of our Pumpkin Chocolate Chip Bread, a delightful fusion of a crispy outer layer and an extra moist interior. Expertly crafted with flour, canned pumpkin, and an abundance of chocolate chips, this bread is a favorite among kids.
Inspired by the beloved Chocolate Chip Pumpkin Bread from the famed Great Harvest Bread Co., I set out on a personal quest to recreate its unmatched flavor. The outcome is this irresistible treat that captures the essence of the original, promising a delightful experience with every delicious bite.
Whether enjoyed as a breakfast treat, an afternoon snack, or a delightful dessert, this bread is sure to leave an indelible mark on your taste buds. Savor the nostalgia and joy of a homemade classic with our Chocolate Chip Pumpkin Bread.
Table of Contents
Ingredients
- 2 cups canned pumpkin pie filling
- 1 1/2 cups white sugar
- 1 1/4 cups canola oil
- 4 eggs
- 2 tsp. vanilla
- 3 1/2 cups all-purpose flour (can swap for gluten-free)
- 1 tsp. baking soda
- 1 tsp. salt
- 1/2 – 1 cup semi-sweet chocolate chips
How To Make Pumpkin Bread
Step 1: Preheat the Oven
Begin by preheating your oven to 400 degrees Fahrenheit (200 degrees Celsius). This step is crucial as it ensures that the oven reaches the desired temperature before you start baking, helping your bread cook evenly.
Step 2: Prepare the Bread Pans
Take two 9×5-inch bread pans and prepare them for the batter. To prevent sticking, generously coat the inside of the pans with non-stick cooking spray. This step is essential to ensure that your pumpkin bread easily releases from the pans after baking, leaving you with perfect loaves.


Step 3: Combine the Wet Ingredients
In a medium-sized bowl, gather your wet ingredients. These include sugar, eggs, vegetable oil, pure vanilla extract, and the star of the show, the pumpkin pie filling. The pumpkin filling will not only provide that delightful autumn flavor but also make your bread moist and tender. Combine these ingredients thoroughly, ensuring the sugar is well incorporated for sweetness.
Step 4: Mix the Dry Ingredients
In a separate, larger mixing bowl, it’s time to combine the dry ingredients. Measure out your all-purpose flour, a pinch of salt to enhance the flavors, and baking soda to help the bread rise. Blend these dry ingredients together until they are evenly distributed.
Step 5: Combine Wet and Dry Ingredients
Now comes the exciting part. Pour the bowl of wet ingredients into the bowl of dry ingredients. Gently stir the mixture until they are just combined. Be careful not to overmix, as this can lead to a tougher texture in your bread. The goal here is to achieve a uniform batter with no visible streaks of dry flour.


Step 6: Add the Chocolate Chips
For that extra burst of sweetness and indulgence, introduce your chocolate chips into the batter. Mix them in gently until they are evenly distributed throughout the dough. The chocolate chips will melt as the bread bakes, creating pockets of gooey, chocolatey goodness.
Step 7: Fill the Loaf Pans
Divide the batter evenly between the prepared loaf pans. The pans should be about two-thirds full. This allows the bread to rise and bake evenly, giving you beautifully shaped loaves with a golden crust.


Step 8: Bake to Perfection
Place the filled loaf pans in the preheated oven. Bake for approximately 50 to 60 minutes, or until a knife or toothpick inserted into the center of the loaf comes out clean. The baking time may vary slightly depending on your oven, so keep a close eye on it during the last few minutes.
Step 9: Let Cool
Once your chocolate chip pumpkin bread loaves are done baking, remove them from the oven and let them cool in the pans for about 10 minutes. This allows them to firm up a bit and makes them easier to remove from the pans without falling apart.
Step 10: Enjoy!
After cooling in the pans, carefully remove the loaves and place them on a wire rack to cool completely. Once cooled, slice, serve, and savor the delightful combination of pumpkin, chocolate, and warm spices in every bite. This chocolate chip pumpkin bread is perfect for breakfast, snacks, or dessert – a true crowd-pleaser for any occasion. Enjoy!

Recipe Tips
- Measuring Dry Ingredients: When measuring flour, spoon it into your measuring cup and level it off with a flat edge. Avoid scooping directly from the flour container, as it can lead to inaccurate measurements and denser bread.
- Room Temperature Eggs: For smoother incorporation into the wet ingredients, use eggs at room temperature. You can quickly bring cold eggs to room temperature by placing them in a bowl of warm water for a few minutes.
- Pumpkin Pie Filling: Be sure to use canned pumpkin pie filling rather than plain canned pumpkin puree. Pumpkin pie filling contains additional spices and sugar, which contribute to the bread’s flavor and sweetness.
- Don’t Overmix: When combining the wet and dry ingredients, stir until they are just combined. Overmixing can lead to a tougher texture in your bread.
- Testing Doneness: To check if the bread is done, insert a toothpick or a thin knife into the center of the loaf. If it comes out clean or with a few moist crumbs (but no wet batter), the bread is ready. If it has wet batter on it, continue baking for a few more minutes and test again.
- Cooling Time: Allow the bread to cool in the pans for about 10 minutes before removing them. This short resting period makes it easier to remove the loaves without them falling apart. After removing them from the pans, let them cool completely on a wire rack before slicing. This cooling process allows the flavors to develop and the texture to set.
- Variations: Feel free to customize your pumpkin bread by adding chopped nuts (such as walnuts or pecans), dried cranberries, or even a swirl of cream cheese filling for extra flavor and texture.
- Serve Warm: Warm slices of chocolate chip pumpkin bread are especially delightful. You can gently reheat individual slices in the microwave for a few seconds before serving.

FAQ
Yes, you can use fresh pumpkin puree, but you may need to adjust the spices and sugar to taste, as canned pumpkin pie filling typically contains added spices and sweetness. For the best results, use a sugar pumpkin or a butternut squash, roast or steam it, and then puree the flesh.
To check for doneness, insert a toothpick or a thin knife into the center of the loaf. If it comes out clean or with a few moist crumbs (but no wet batter), the bread is done. If it has wet batter on it, continue baking for a few more minutes and test again.
Yes, you can make a vegan version of this bread by using egg substitutes like flax eggs or applesauce. Replace each egg with one tablespoon of ground flaxseed mixed with three tablespoons of water, or 1/4 cup of unsweetened applesauce.
Yes, you can make chocolate chip pumpkin muffins with this recipe. Simply scoop the batter into muffin tins lined with paper liners and adjust the baking time. Start checking for doneness around 18-20 minutes for standard-sized muffins.
Storage Instructions
To keep your freshly baked chocolate chip pumpkin bread at its best, store it in an airtight container or wrap it tightly in plastic wrap. If you plan to consume it within a few days, leaving it at room temperature is perfectly fine. However, for longer storage, it’s advisable to refrigerate the bread, where it can stay moist and delicious for up to a week.
Alternatively, you can freeze it for prolonged storage. To freeze, wrap individual slices or the entire loaf in plastic wrap and then place it in an airtight freezer-safe bag or container. It can be frozen for up to a few months. When you’re ready to enjoy it again, thaw it at room temperature or gently reheat individual slices in the microwave for that warm

Pumpkin Chocolate Chip Bread Recipe
Ingredients
- 2 cups canned pumpkin pie filling
- 1 1/2 cups granulated sugar
- 1 1/4 cups canola oil we like Mazola
- 4 large eggs
- 2 teaspoons vanilla extract
- 3 1/2 cups all purpose flour can swap gluten-free flour
- 1 teaspoon baking soda
- 1 teaspoon salt
- 1 cup semi sweet chocolate chips
Instructions
- Preheat the oven and prep the pans. Preheat oven to 400 degrees. Prepare two 9×5 loaf pans with non-stick cooking spray.
- Combine the wet ingredients. In a medium-sized bowl, combine the wet ingredients including sugar, eggs, oil, vanilla, and pumpkin mix.
- Combine the dry ingredients. In a large mixing bowl, combine the dry ingredients including flour, salt, and baking soda.
- Combine. Pour the wet ingredients into the dry ingredients and stir until slightly blended. Add the chocolate chips and blend until the dry ingredients are incorporated into the wet ingredients. Pour into prepared bread pans.
- Bake. Bake for 50 – 60 minutes or until a knife inserted into the center of the loaf comes out clean. Let cool for 10 minutes before removing it from the bread pan.